These guidelines are for the Senior Design Makerbot in GM Lab
If you are using any of the bots in the RP Lab, even for Senior design, you must follow RP Guidelines, including formal training on MakerBot use by the RPL staff.
Preparation
Create part file and export from CAD as an .STL
- For Soildworks, follow this guide to create the .STL
Start MakerWare
- MakerWare can be opened on a MEAM computers by accessing Start Menu >> All Programs >> MEAM Software >> MakerBot Folder >> MakerWare 3.6
- MakerWare can also be downloaded to your personal MAC or PC from the MakerWare Website.
Import your .STL into MakerWare. 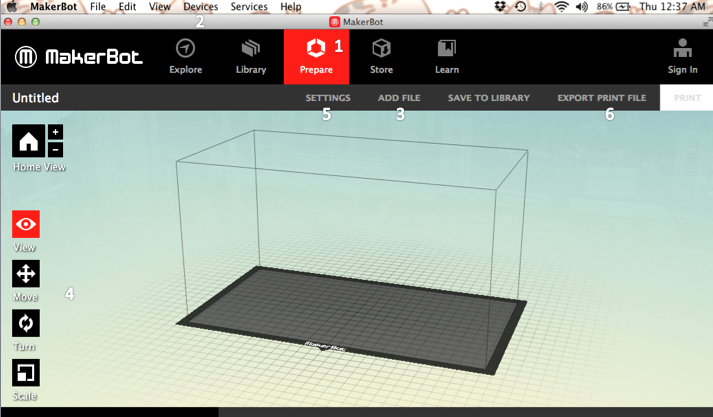
- Click the Prepare button in the LEFT center of the screen.
- Click the Device button in the top RIGHT of the screen.
- Device >> Select Type of Device >> Replicator (5th Generation)
- Click the Add button in the top RIGHT of the screen.
- If promoted, place on platform and/or convert units.
- Use Move, Turn, and Scale bottoms to place piece.
- Double click on each button for more control options
- On Move panel check that you part is on platform and centered
- On Turn panel, use Lay Flat to ensure your part is lying down
- Click the Settings button in the top RIGHT of the screen.
- Adjust print preference (infill, layer height, support, raft, etc.)
- Click Export Print File and save your file as a .Makerbot file type to a flash drive
- Files must be named: PennKey_Filename.Makerbot (ex. BenFra_Top.Makerbot)
Printing
Note that the filament loading and unloading procedure is included in these directions for completeness. However, the MEAM 446 MakerBot will be preloaded with black filament.
- Turn on the Bot

- Switch located on the back left corner
- Check bed plate tape
- If not present or damaged, cut and gently apply a piece of the wide blue painters tape.
- Level build plate
- From the main menu, select Utilities >> Assisted Leveling and follow all onscreen directions.
- Rack filament
- Lift center tab and lock filament in place
- Push filament counter-clockwise through guide tube - the filament should unwind in a counterclockwise direction as viewed from the front of the printer.
- Load filament
- Ensure that the filament has a clean-cut end
- From the main menu, select Filament >> Load and follow all onscreen directions.
- Print
- Insert your USB drive
- From the main menu, select Print >> USB drive >> your file>> Print.
- There may be a delay while the file loads
- The print will automatically start
- Once your job is complete and nozzle is back in home position (right back corner)
- Remove bed plate by pulling front lip forward and sliding out.
- Gently remove/ wedge piece off *DONT SCRAPE, WEDGE*
- Clean and replace the plate
- Unload filament
- Utilities >> Filament >> Unload and follow the on-screen instructions
- Unmount the filament and remove USB drive
- Turn off the Bot
- Utilities >> Power down
Errors and Intended Use
Note that the RPL staff is not charged with maintaining this MarkerBot. IF YOU ENCOUNTER ERRORS POST TO "Instructors" ON THE MEAM 445/446 PIAZZA PAGE. DO NOT CONTACT THE RPL STAFF.
Be respectful of the machine and your classmates when using the printer. Treat it well. It is unlikely to be replaced/repaired if broken.
This printer may only be used for printing parts associated with MEAM 446.